I thought it might be fun to do a breakdown or a mini review of each makeup brush, where I like to use it, and demonstrate how I use it day to day. So here it is, my video of top makeup tools!! Enjoy!!
Monday, April 15, 2013
Makeup Brush Faves Part II
Hey guys!!! I so loved Mary's post from last week!! Honestly, what is an artist without their tools?! I just had to add my own favorites, as there are so many awesome, inexpensive makeup brushes out there.
I thought it might be fun to do a breakdown or a mini review of each makeup brush, where I like to use it, and demonstrate how I use it day to day. So here it is, my video of top makeup tools!! Enjoy!!
I thought it might be fun to do a breakdown or a mini review of each makeup brush, where I like to use it, and demonstrate how I use it day to day. So here it is, my video of top makeup tools!! Enjoy!!
Wednesday, April 10, 2013
5 Brushes That Will Change Your Life (You Can Thank Me Later)
Hey dearest readers!
After attempting 3 different videos, I realized my technical difficulties have reached Biblical curse-level, so you'll just be getting text posts from me for the time being. I'm sorry! I really do exist and do things! Luckily, sweet Elizabeth is an endless fount of ideas and brilliant videos, so keep checking out our Youtube channel!
Today, I wanted to share with you 5 makeup brushes that I find necessary for my makeup kit--I use them daily! They help with application, make your makeup appear more professional, and best of all they're AFFORDABLE. I, like every makeup junkie, wish I had an arsenal of MAC brushes. But alas, on a small income, you do what you can with what you have and luckily, the makeup industry has caught on and offers good quality products for a very fair price!

1. Handled kabuki brush.
These are great brushes, not only for applying any kind of powder foundation or setting powder, but for BLENDING in your makeup. Usually I'll apply liquid foundation with my fingers, but afterwards, I like to take one of these guys and use small, circular sweeps to blend it all in, especially around the corners of my nose, into my hairline, and down my chin (to avoid "the line." You know what I mean!). The handles make them easy to use, and I love the dense, soft bristles. Mine are Sonia Kashuk (the pink one was a special edition for breast cancer...look for it again in October!) and EcoTools. My only complaint with the Sonia Kashuk is minor bristle fallout. If that's a major pet peeve, try the EcoTools one! It's much softer, too.
2. Blush brush.
This is a must. You must have one. You simply must. Especially if you're using drugstore blushes, because the brushes they come with look like this:

You know the ones. They're about as big as a quarter, made of cheap plastic and terrible fibers? And HOW are you supposed to get any product onto your face without looking like a bunch of little pink lines? This is why you need a good, fluffy blush brush. The bristles should be full for good application, but not too firm or they'll move around the foundation underneath. My favorite is another of Sonia Kashuk's, but again my issue is with bristle fallout (though it's not so bad on this brush). ELF has a whole slew of makeup brushes (in the $1-$5 range!), and I have ZERO complaints with any of the ELF brushes I own. Definitely worth checking out.
3. Eye shadow brush.
You need this for the same reason you need the blush brush:
 |
| "This is a great idea!" said no one EVER. |
If you get no other brushes, at least get the blush and the eyeshadow brushes! A good shadow brush will make your application SO much smoother. You can really get the whole lid, or just angle it so you get the outer corners, or use it for highlighting. I use one brush for my light colors and one for my darker ones (because I'm obsessive like that), and those two do just fine for me! Mine are from an El Cheapo brand called Studio Tools, and they work just fine. I think I have a couple from ELF, too, and I love them just as well!
4. Blender.
Blending your eye makeup makes such a difference, omg. I wish I could make people understand this. I think there's a common misconception that you're somehow going to rub off all your makeup if you blend, and that's just not true. It's not going anywhere. Besides, it's always easier to layer on some more product than it is to take it off! So for the love of Pete, just get a blender brush. Use it when you do more than one color on your eyelid, and be amazed. It'll make your eye makeup look so much smoother and more professional. Just do it. A decent blender brush is anything with a more conical shape and fuller bristles. Mine is from Sonia Kashuk, and I love it.
5. Smudger.
I lost my smudger once and almost cried. It was like the world had just stopped spinning because I had no idea how I was supposed to do my eyeliner anymore (I got it back though! It had fallen behind my dresser!). A smudger is basically a brush handle with a little cone-shaped sponge at the end, and you can use it to blend out your eyeliner. I LOVE this because I, unlike media-portrayed "perfect" models and celebs, can't always get my eyeliner straight on the first try. Or when I do a smokey eye, I like to have smokier eyeliner. Or when I line my bottom lashline, I don't like a Robert Smith look (no offense, man. I love you, Robert Smith, but your makeup skills leave a lot to be desired.). I especially love this to blend out my bottom lashline, giving it a smokier look. Anyway, I can't live without mine. This one is originally from Studio Tools but I can't find it online! ELF has one for $1 though!
So there you have it. I realize the Sonia Kashuk brushes can be a little pricier, but honestly, I probably wouldn't repurchase any of them now that I've discovered ELF's brushes! They're a fraction of the cost and as I said, I don't have any of the dreaded bristle fallout. You don't have to pay a fortune to improve the quality of your makeup application. Even if you slowly start replacing your tools, one week at a time, you'll end up with things that will make your makeup process so much easier and your looks that much more professional looking!
Until next time, bodacious brushing!
-Mary
Monday, April 8, 2013
Wet 'N' Wild Wonder
Hello all! I hope that you guys are having a somewhat okay Monday (it is Monday after all ; ) At the start of this lovely April week, I wanted to take a minute and think back on all the awesome products I've used in my tutorials/blog posts.
Specifically, in thinking back on many of my awesome purchases, I have really been BOWLED OVER by the amazingness that IS Wet 'N' Wild products. In the past, I was seriously missing out. This brand was just something I just didn't pay much attention to as I continually proceeded to pay $10 plus for products that weren't half as good.
Thankfully, though with age comes wisdom. I recently made the switch to Wet N Wild products and I don't think there is any going back. I mean they are just so awesome. The price point is great, the quality is awesome, and even the packaging looks nice!

I really had to think hard about what my favorite products were to make the video below. It was a hard choice and now I own so much stuff from them : ) But, nevertheless, hard choices had to be made because it's our duty, as always, to make sure our readers keep on saving and loving their discount purchases.
With no further ado, I share with you my Wet N Wild faves (to date.)
Specifically, in thinking back on many of my awesome purchases, I have really been BOWLED OVER by the amazingness that IS Wet 'N' Wild products. In the past, I was seriously missing out. This brand was just something I just didn't pay much attention to as I continually proceeded to pay $10 plus for products that weren't half as good.
Thankfully, though with age comes wisdom. I recently made the switch to Wet N Wild products and I don't think there is any going back. I mean they are just so awesome. The price point is great, the quality is awesome, and even the packaging looks nice!
I really had to think hard about what my favorite products were to make the video below. It was a hard choice and now I own so much stuff from them : ) But, nevertheless, hard choices had to be made because it's our duty, as always, to make sure our readers keep on saving and loving their discount purchases.
With no further ado, I share with you my Wet N Wild faves (to date.)
Thursday, April 4, 2013
Splurge vs. Save: Lipstick for Gloss Lovers
Let me tell you a story about how I was stupid a while back and thought that high price = high quality, and was then proven most egregiously wrong.
Well, since my favorite NYC lipgloss has been discontinued (and the online price bumped to $14! It used to be TWO BUCKS in drugstores!), I've been in a a bit of a panic over finding something to replace it. There are loads of lipsticks out there, I just hate the texture that most of them have. They leave my lips feeling dry--or worse, CAKEY--and the color payoff is oftentimes mediocre at best.
So, being an idiot, I decided I was feeling fancy one day (you have to say "fancy" with a British accent..."fauncy") and went to Sephora to see what I could find.
I was immediately drawn to the Benefit Silky Finish Lipsticks. They came in beautiful black and white tubes, had the most divinely creamy texture, and had a variety of colors to choose from. So I bought one in "Rocket Pop."

It was a beautiful color and felt absolutely HEAVENY on my lips.
For like, fifteen minutes.
After that? Gone. Gone like The Rock's street cred after doing that Tooth Fairy movie. Just like, NOTHING.
Sorry, Benefit, but if I'm paying almost TWENTY DOLLARS for something, I want to it to last longer than that! God forbid you try to eat or drink anything in it! I might as well have been wearing my tinted Burt's (it totally would've lasted longer). I don't care how pretty the packaging is. If it sucks that badly, it's going back.
So I owned that for less than 24 hours. So much for being fancy.
Then I went into CVS, and saw the Revlon Lip Butters. The internet has been abuzz with these things already, so I decided to try one.
Oh. My. WORD.
They are so worth the hype. This may well be the world's perfectest lip product. It feels like a chapstick going on, has the finish of a gloss, and the color payoff of a lipstick. This is like the Holy Grail of lip products.
Being a makeup junkie and a CVS Rewards Card member with some cool coupons and stuff, I got five. Which came out to just over $20. So for two dollars more than the Benefit Craptacular Lipfail, I got FIVE WHOLE LIPSTICK THINGS.
(I apologize for the utter lack of HD photography. I do what I can with what I have, okay?)

Those are the ones I own, and the whole line has dessert names. How cute! From left to right: Strawberry Shortcake (1), Peach Parfait (2), Berry Smoothie (3), Lollipop (4), and Candy Apple (5).
I wanted to swatch them out so you can see them:


Strawberry Shortcake is a really sweet, light pink color. When I first tried it, it immediately reminded me of Mac's Viva Glam Gaga, which I love. But this one just seemed a little more wearable for me. I love pale pinks (St. Germain by Mac is SO pretty, I just can't wear it!), but I have a hard time finding a good shade. This one is light without looking pasty!

Peach Parfait is a perfect neutral. It's a peachy pink with gold shimmer, but I didn't even notice the shimmer until I photographed it. It's definitely not like you have massive chunks of glitter on your lips. This one is perfect for everyday, and I think it would be especially pretty in the summer!
Berry Smoothie is my favorite (I'm on my third tube!), because that shade is one of my go-to colors for everyday wear. I like berry colors, because if I go too light on lip color with my pale complexion, I look dead. So I definitely like a little bit richer colors. This one is exactly how it sounds--a pinkish berry color. I wore it today at work all day, and the staying power is pretty remarkable for a balm-gloss type thing.
Lollipop is an awesome fuschia, hot pink color. It's bright, but what's great about these is how buildable they are--apply lightly for a sheer wash of color, or apply with a heavier hand for brighter, more "lipsticky" color. This one is just FUN. I love brights, and I can definitely see it getting a lot of wear this spring and summer.
And finally, Candy Apple is a fire engine red with orange undertones. I was torn between getting that one and one called Cherry Tart, but as aforementioned, I love berry tones and have a lot of deeper reds. I don't have anything with ANY orange in it, though, so I decided "what the heck" and went for it. Turns out that coral-tinted reds are flattering on me! Woohoo! This is an awesome punch of color for gutsy girls or days when you need that extra "pop." I think pairing it with a neutral or gray eye would be fun.

Anyway, they run about $7 a piece, and they are worth every single penny. If you come across them, grab one and just try it. You won't be disappointed!
You also won't be out $20 like you'd be if you'd gone to Sephora. ;)
Fantastic Freebies and Other Frugal Finds
After majoring in the language of English, and attaining a corresponding bachelors degree, I have yet to find a single word that is better than that of "free." "Free," no matter how you use the word, most always just SOUNDS good. When you hear it, you just can't help but think:


 It felt good---maybe a little too great considering how much I smiled all the way home. But the point remains---the treasures are out there just waiting to be found--both freebie and otherwise. Hopefully, these tips help to point you beauties in the right direction. Don't forget, if you have a method that works for you make sure to add it into the comments box. I always like new tips too!
Until next time,
Terrific Treasure Trolling
Eliz
OR
OR MAYBE EVEN
Freedom is just an especially nice concept. I mean, how much do we all value our "free time" or our "free hearted" friends or family. And just think about what you'd do without your "freelance" hobbies. One thing, however, that makes women go especially wild is "free" stuff (with myself serving as no exception to that rule.)
Who doesn't love the opportunity to try that lip gloss, that eyeliner, that perfume, or that shadow that they've been DYING to get their hands on---at no cost at all? It may seem like an impossible concept...but I will show you how easy it is to attain free items.
Here is a photo of some freebies I've acquired very recently.

It was really super easy to do too! It just took me doing a little personal research on how to shop sensibly. The pointers are listed below.
GET COUPON CRAZY
*This may seem super obvious, but clipping coupons from the Sunday paper can easily make clearance items FREE of charge. EXAMPLE:I used a Covergirl coupon for $1.00 off any covergirl eye product on the green eyeshadow (pictured above) which was on sale for .94 cents at Target.
*Awesome websites, such as couponcabin.com( http://www.couponcabin.com/) also give cosmetic coupons that may not be featured in local newspapers. Extra bonus---they often show their consumers how to correctly pair coupons with merchandise for optimum discounts. Many times, you only have to provide a valid email address to receive manufacturers coupons that can really cut down on the cost of your item. EXAMPLE: I signed up on EcoTools website, and received a $1.00 off coupon for any EcoTools product. Extra bonus---they still send me great coupons for other items all the time. The loofah, pictured above, only cost .86 cents at my local WalMart.
*Many discount retailers, such as Dollar Tree, have also begun accepting manufacturers coupons--so check with your local marketplaces to see what the couponing policy is to get further discounts. EXAMPLE: I used a $1.00 off any Maybelline product coupon to the mineral foundation (listed above) at my local Dollar Tree for the "Beyond the Pale" previous post regarding body tanner. Remember, this type of purchase requires research with the retailer and knowledge of product selection.
CELEBRATE SAMPLE SAVVY
*Perhaps my favorite function of several couponing websites, such as the one mentioned above, is the fact that they let you sign up for free samples. All you need is a valid address to receive free merchandise from many retailers. Extra bonus---companies often advertise "freebies" before the merchandise even hits the shelves. So essentially, many times, you're getting a chance to try a new item before anyone else has--free of charge. EXAMPLE: I recently signed up for a sample of the new Loreal line of shampoos and conditioners and received a fairly large sample. Also, I got a trial swipe of the new Escada fragrances. Remember, sample offers change all the time and take a long while to receive.
KNOW YOUR RETAILERS
*In order to get premium discounts on your cosmetic purchases, make sure to evaluate weekly sale fliers and maintain a central group of retailers (in your mind) as you go through coupons. This will help you to evaluate where you think you can get the best deals.
*Don't disregard the clearance buckets! It may, initially, seem kind of daunting to go combing through a bucket of stuff--but if you have a few minutes to spare it can sometimes prove to be WORTH IT! Just think of it like an ongoing treasure hunt---some days are going to be better than others--but you won't believe the stuff I've found for less than five dollars in there---even without having to go through the trouble of pairing it with a corresponding coupon! Which leads me to:
OTHER FRUGAL FINDS
*Think outside of the box. Sometimes the last place that you would think of for in-demand cosmetic items not only carries something you want...but has it for cheaper than you'd expect to find. Some examples of this include my last month's treasure hunt to Big Lots. I located all the items below in a big ol' bin o' stuff on the bottom shelf (does this make me a scavenger?!)


Essentially:
* I got a tiny pair of tweezers (perfect for applying falsies) for $1.00.
* I got a CoverGirl lip pencil in a really pretty plum color for $3.00. On drugstore.com, this same pencil typically retails for between $5 and $6.
*And, as if you didn't think ELF products could get any more cost-effective, I picked up this cute little smudge brush for .95 as opposed to the dollar it usually sells for most anywhere else. Holy...moly.
*Also, I picked up a Maybelline Lash Stiletto (my favorite mascara..ever) in brownish black for $3.00. Usually I pay about $8.00 for the same exact tube.
*Finally, I got a really nice Revlon lipstick...for $2.00. Two...dollars. That would usually run you at least $7.00 (and trust me...whatever you pay for it...worth it...love Revlon lipsticks :)
So, for ten dollars, I got tweezers, a lip pencil, a smudge brush, a tube of mascara, and a lipstick.
Until next time,
Terrific Treasure Trolling
Eliz
Wednesday, April 3, 2013
Faux Face Strip Fail
I was super anxious this morning to try a new diy project I've seen floating all over cyberspace---faux face strips!!
Now, as you guys probably already know, face strips are small, bandaged-sized "stickers" designed to adhere to women's skin tightly.This is supposedly to ensure a "deep down clean" that assists clogged pores and to remove dirt beneath skins surface. In my experience, they make your skin feel nice and smooth afterward. Face strips are, in summary, a face-washing device. They typically range in price from $7.00 to $10.00 for a package of 14 strips.
Let me just repeat that again. Fourteen small(ish) face strips for seven to ten dollars. If you are anything like me, you are probably thinking of all the other magical things you could do with that same seven to ten bucks. These may include: buying a burrito from your favorite lunch spot, succeeding at getting your car above the "E" mark (just barely), or purchasing a new book from a bookstore. So I set out to attempt to create my own strips using a recipe I found online. It called for the following ingredients:

* BOWL (FOR MIXING)
* CHEAP PAINTBRUSH (FOR APPLICATION)
Essentially, you mix the Tbsp of milk and the Tbsp of gelatin together. The mixture ended up looking like a combination of paste and baby food. Ew.

Then I popped it into the microwave for about 10-15 seconds. This made the texture thin out a bit


Now, as you guys probably already know, face strips are small, bandaged-sized "stickers" designed to adhere to women's skin tightly.This is supposedly to ensure a "deep down clean" that assists clogged pores and to remove dirt beneath skins surface. In my experience, they make your skin feel nice and smooth afterward. Face strips are, in summary, a face-washing device. They typically range in price from $7.00 to $10.00 for a package of 14 strips.
Let me just repeat that again. Fourteen small(ish) face strips for seven to ten dollars. If you are anything like me, you are probably thinking of all the other magical things you could do with that same seven to ten bucks. These may include: buying a burrito from your favorite lunch spot, succeeding at getting your car above the "E" mark (just barely), or purchasing a new book from a bookstore. So I set out to attempt to create my own strips using a recipe I found online. It called for the following ingredients:

* 1 TBSP MILK
* 1 TBSP UNFLAVORED GELATIN* BOWL (FOR MIXING)
* CHEAP PAINTBRUSH (FOR APPLICATION)
Essentially, you mix the Tbsp of milk and the Tbsp of gelatin together. The mixture ended up looking like a combination of paste and baby food. Ew.

Appetizing no?
Then I popped it into the microwave for about 10-15 seconds. This made the texture thin out a bit

This is a photo of me thinking I'm showing you the new texture. Just trust me it was thinner :)
Next, I just applied it to the skin using my paintbrush. It kind of felt like applying a wax treatment or something. Also, I should note, it kind of took on an interesting smell. At that point I was wishing I could have used some good ol' lime J-E-L-L-O. Who doesn't love that smell?! But alas....
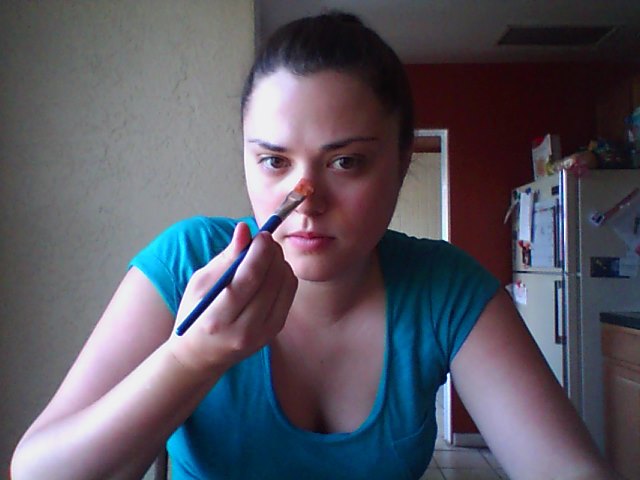
Then came the hardest part for me...letting it dry and doing...NOTHING. I'm one of those people who just immediately wants to touch whatever's on their face...not a good idea for this experiment

Wanting to fiddle with the stuff so bad....
Then, after waiting for fifteen minutes (the allotted amount of time stated necessary to fully dry the treatment) I began "peeling."

OUCH!
I know the strips are supposed to tightly adhere to the skin..but OUCH. It hurt pretty darned bad to be peeling the stuff off the face. I think I probably only got like a centimeter off and then just chickened out and washed it off with warm water. Maybe I left it on too long? I don't know..but geesh.
SUMMARY: Overall, the face strip was easy to afford and easy to apply. However, the process of "peeling" the mask off makes me (most likely) not interested in trying it again. To add, if I did attempt it again, I would probably make half the batch called for and leave on for only ten minutes. I would then most likely wash it off instead of attempting any kind of a peeling action.
So what was the result?! Well, I have to say the areas I applied the "strips" do feel clean and smooth...but underneath the eyes my skin is saying "youch!." Overall, I believe the "strips" do work in cleaning the skin but the person using them needs to have a surefire method in play to avoid having any irritation when scrubbing it off.
Until next time,
Experiment Excellence
Eliz
Monday, April 1, 2013
Spring is in the Air!!!
What's not to love about Spring? The weather, the love in the air, the bright colors. Ah...what a delightful season. Inevitably though, along with the magic of spring's arrival comes the weddings, the parties, and the social gatherings that you must attend.
As we all know, makeup looks that can take on the great outdoors can be a tricky, tricky concept. I came up with this look, listed below, that I think looks great for those springtime soirees. ENJOY!


As we all know, makeup looks that can take on the great outdoors can be a tricky, tricky concept. I came up with this look, listed below, that I think looks great for those springtime soirees. ENJOY!


Subscribe to:
Posts (Atom)